Creating a knowledge base
Creating a knowledge base takes two fields. Filling it is the real work, so this page goes on to connect its first source: an import connector that keeps pulling documents in for you.
- The Knowledge Base app in your top bar.
- These permissions: Knowledge Base · Component - Create, Knowledge Base · Setup - Create, IntELIEKonnect · Import - Create.
- For the source, an IntELIEKonnect import connector that is active and connected. Fetch now also needs IntELIEKonnect · Import - Execute.
If Knowledge Base isn't in your top bar, your role can't view it or your plan doesn't include it. Ask a workspace administrator, or see Permissions and module visibility.
Steps
Open the list
Select the Knowledge Base icon in the top bar, then Knowledge Base in the left rail. Create KB sits in the header here and on Overview.
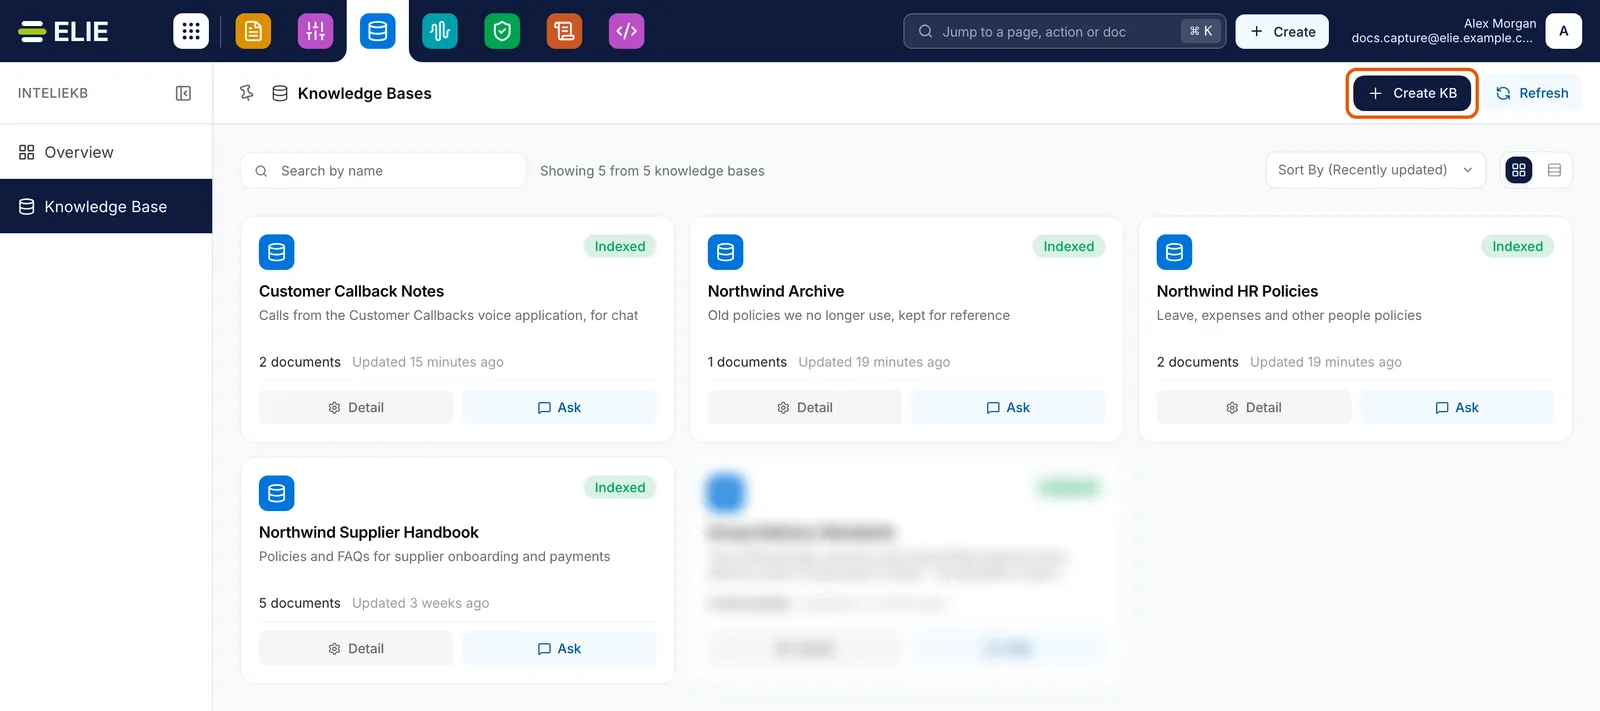
The Knowledge Bases page with its knowledge bases as cards, among them Northwind Archive, Northwind HR Policies and Northwind Supplier Handbook, each with Detail and Ask, and one blurred. The Create KB button in the header is ringed. EnlargeCreate it
Select Create KB. In the Add Knowledge Base panel, enter a Name of 2-100 characters (letters, numbers, spaces and full stops, apostrophes or hyphens) and a Description, then select Save. The new knowledge base opens on its first section, usually Documents.
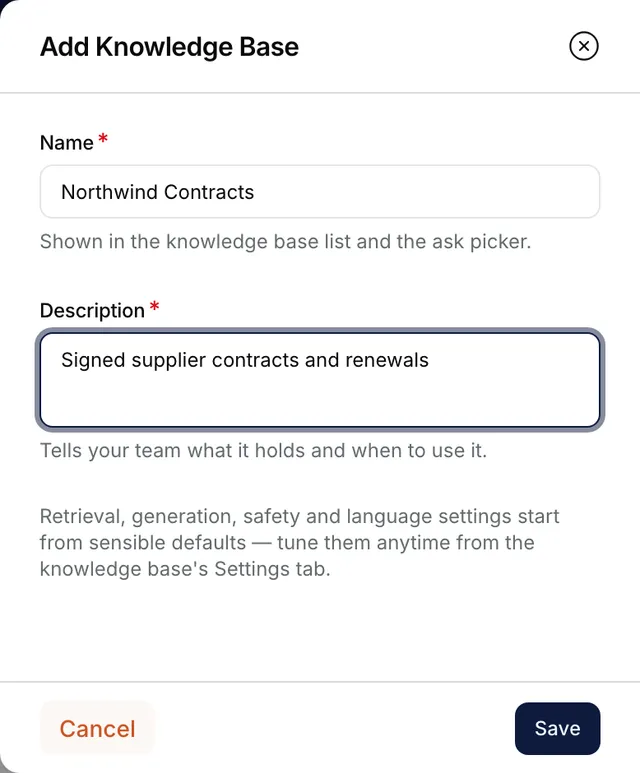
The Add Knowledge Base panel with Name reading Northwind Contracts and Description reading Signed supplier contracts and renewals, above Cancel and Save. Add an import channel
Select Sources in its menu, then Add Import Channel. A page opens listing the connectors you can connect.
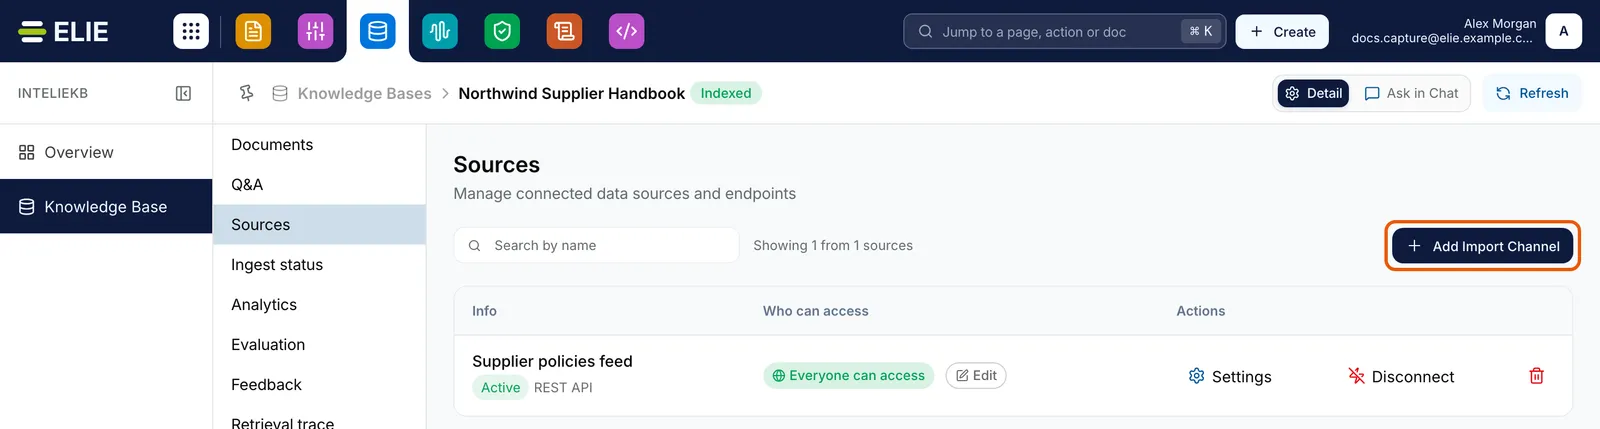
The Sources section of Northwind Supplier Handbook with its list of sources and the Add Import Channel button at the top right ringed. EnlargePick the connector
Under Select import channel, select the connector. Search by its name or its connector type if the list is long.
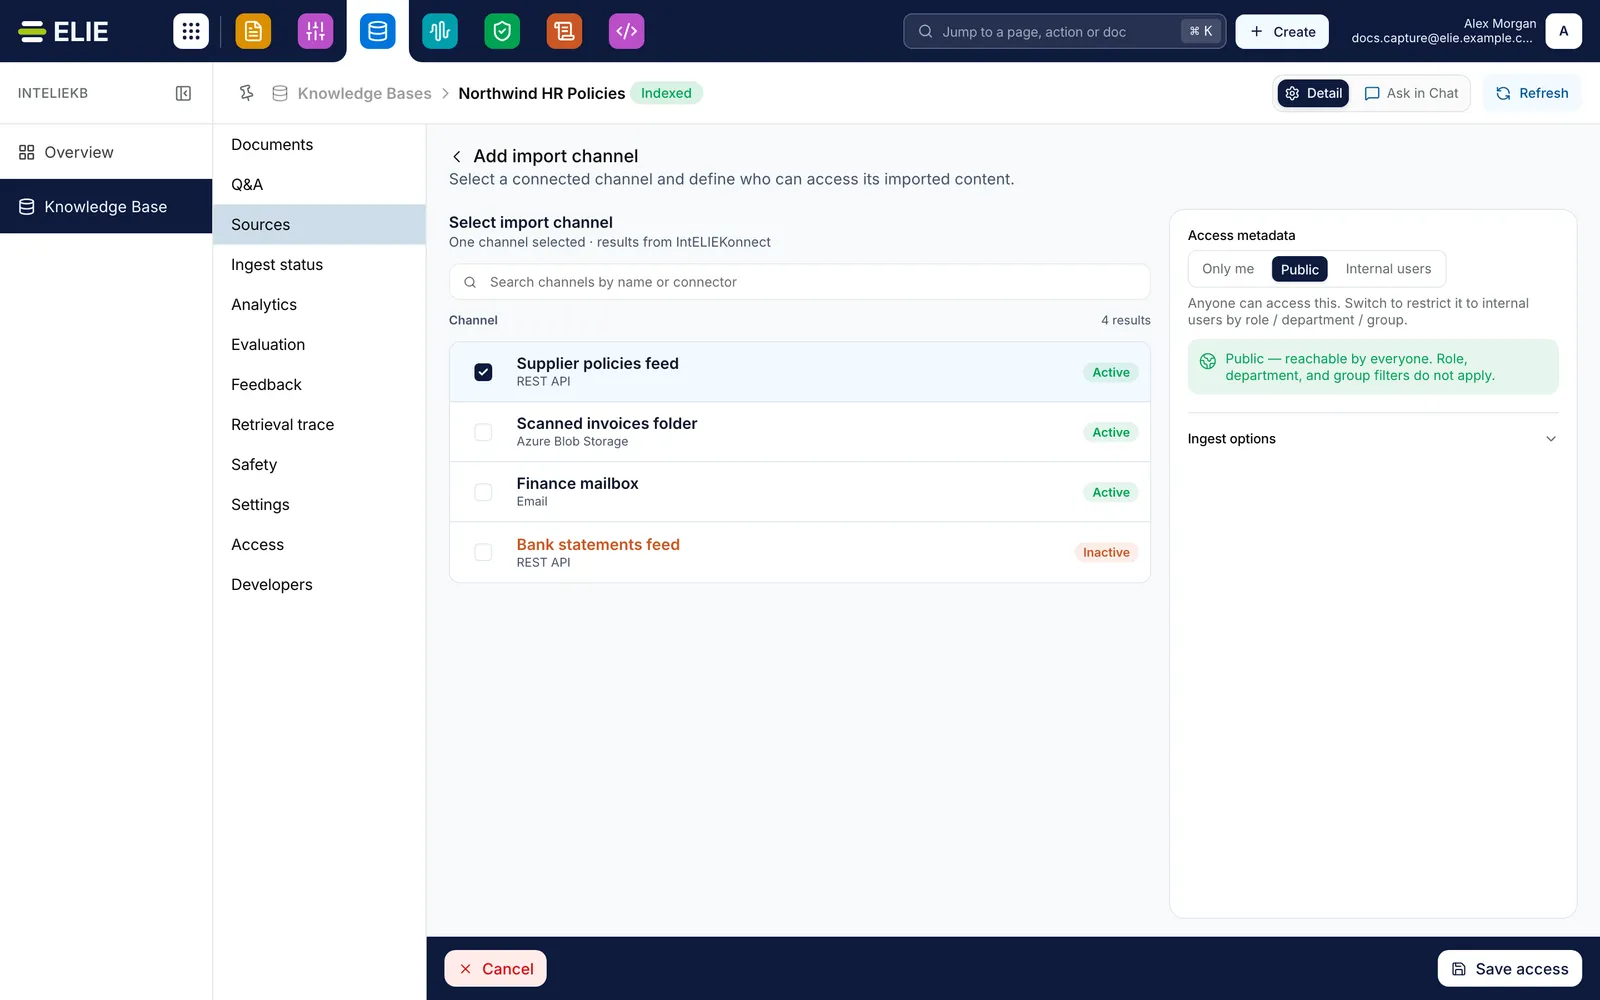
The Add import channel page of Northwind HR Policies: Select import channel with a search field, Supplier policies feed ticked, two more Active connectors and Bank statements feed greyed out as Inactive, the Access metadata card with Public chosen, and Cancel and Save access along the bottom. EnlargeDecide who can retrieve its documents
Under Access metadata, choose Public, or Internal users and pick an Access role, Department or People group. Ingest options holds a Chunking template and Custom tags, if every document should carry them. Select Save access.
Pull the first batch
On the source's row, select Settings, then Fetch now. Documents appear on Documents labelled IntELIEKonnect as they arrive, and their indexing shows on Ingest status.


What success looks like
- Knowledge base created successfully! appears and the new knowledge base opens, its header pill reading Empty until documents or Q&A pairs arrive.
- A confirmation starting Connected appears, and the source's row on Sources reads Active.
- After Fetch now, a confirmation starting Fetch started appears and rows land on Documents.
Only you can reach it so far
A new knowledge base reaches you and tenant administrators, nobody else. The Access role, Department and People group lists in step 5 only offer what has been granted access to this knowledge base, so on a new one they are empty and the card says so. Either choose Public, or grant access first on Access and then select Edit on the source. See Who can see a knowledge base.
The pill is worked out from what the knowledge base holds, not from indexing: Empty with no documents and no Q&A pairs, Indexed with one or more of either, even if every document failed. Check Ingest status after a first load.
If something goes wrong
| Symptom | Likely cause | What to do |
|---|---|---|
| There is no Create KB button. | Your role lacks Knowledge Base · Component - Create. | Ask a workspace administrator. |
| Save stays greyed out. | Name or Description is empty or breaks the rules. Messages appear once you leave a field. | Select into each field and out again to see the message, then fix it. |
A message reads knowledge_base with name '…' already exists. | Another knowledge base in your organisation has that name, possibly one you cannot see. | Choose another Name. |
| The connector you want is missing, or greyed out as Inactive. | Only import connectors that are active and connected can be picked. | Finish or switch it on in IntELIEKonnect first; see Verifying a connector. |
| Add Import Channel is greyed out. | Connecting needs Knowledge Base · Setup - Create and IntELIEKonnect · Import - Create; hover it to see which is missing. | Ask a workspace administrator. |
Next
- Uploading documents to a knowledge base - one-off files and new versions.
- What a source is - pausing, editing and removing a source.
- Who can see a knowledge base - sharing it beyond yourself.