Managing users
Users lists everyone who has accepted an invitation to your workspace. Use it to find a person and change their name, their roles, or the departments and groups they belong to.
- The Access Control app in your top bar.
- These permissions: Identity & Users · User - List, Identity & Users · User - Update, Roles & Permissions · Role - Execute.
- Roles & Permissions · Role - Execute is only needed to change someone's roles. Changing their departments or groups also needs Identity & Users · Department - Update or Identity & Users · Group - Update.
If Access Control isn't in your top bar, your role can't view it or your plan doesn't include it. Ask a workspace administrator, or see Permissions and module visibility.
Steps
Open Users
Open Access Control: the green shield in the top bar, or Access Control in the menu under your avatar. It opens on Users.

The top bar of Elie with the module icons. The green shield icon is ringed and its tooltip reads Access Control. EnlargeFind the person
Type into Search by user, roles, dept, groups. Whatever its placeholder says, it matches names and email addresses only. To narrow by anything else, select Filter By and use its Role, Status, Department and Group tabs, then Apply. No role on the Role tab finds people with no role at all.
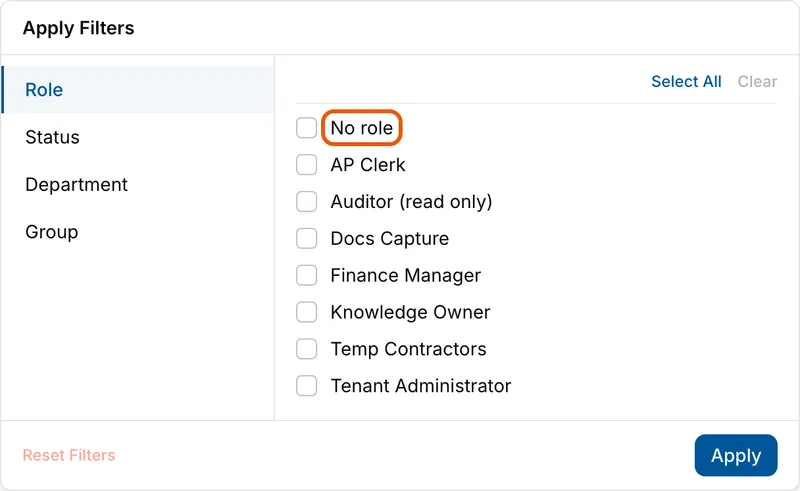
The Filter By panel on Users with its Role tab open: No role, ringed, then AP Clerk, Auditor (read only), Docs Capture, Finance Manager, Knowledge Owner, Temp Contractors and Tenant Administrator, each with a tick box, above Reset Filters and Apply. Read the row
Each row shows USER NAME, EMAIL, STATUS, ROLE, DEPARTMENT, GROUP and JOINED; someone with several roles has them listed together. The newest people come first. To change the order, open Sort By and choose Name or Joining Date with the arrows beside it.
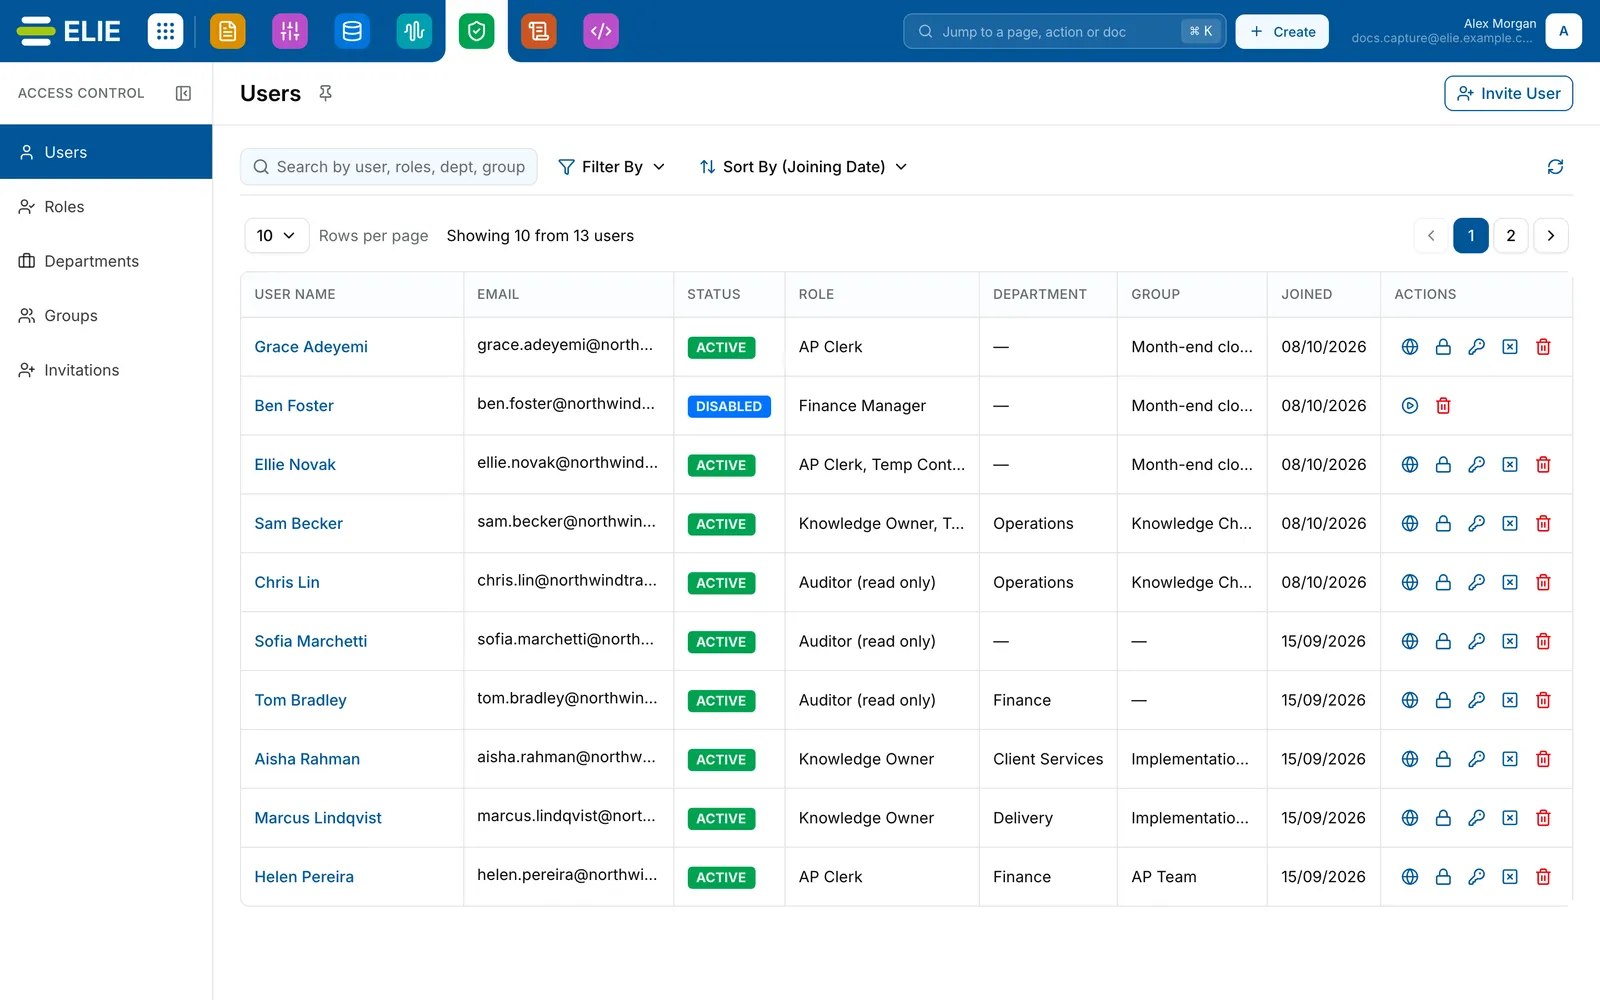
The Users list showing 10 of 13 users, newest first. Grace Adeyemi, Ellie Novak, Sam Becker and Chris Lin are ACTIVE, Ben Foster is DISABLED, each row with a role, department, group, joining date and the account action icons. EnlargeOpen User Details
Select the person's name. User Details opens with their Display Name, Email and Status at the top.
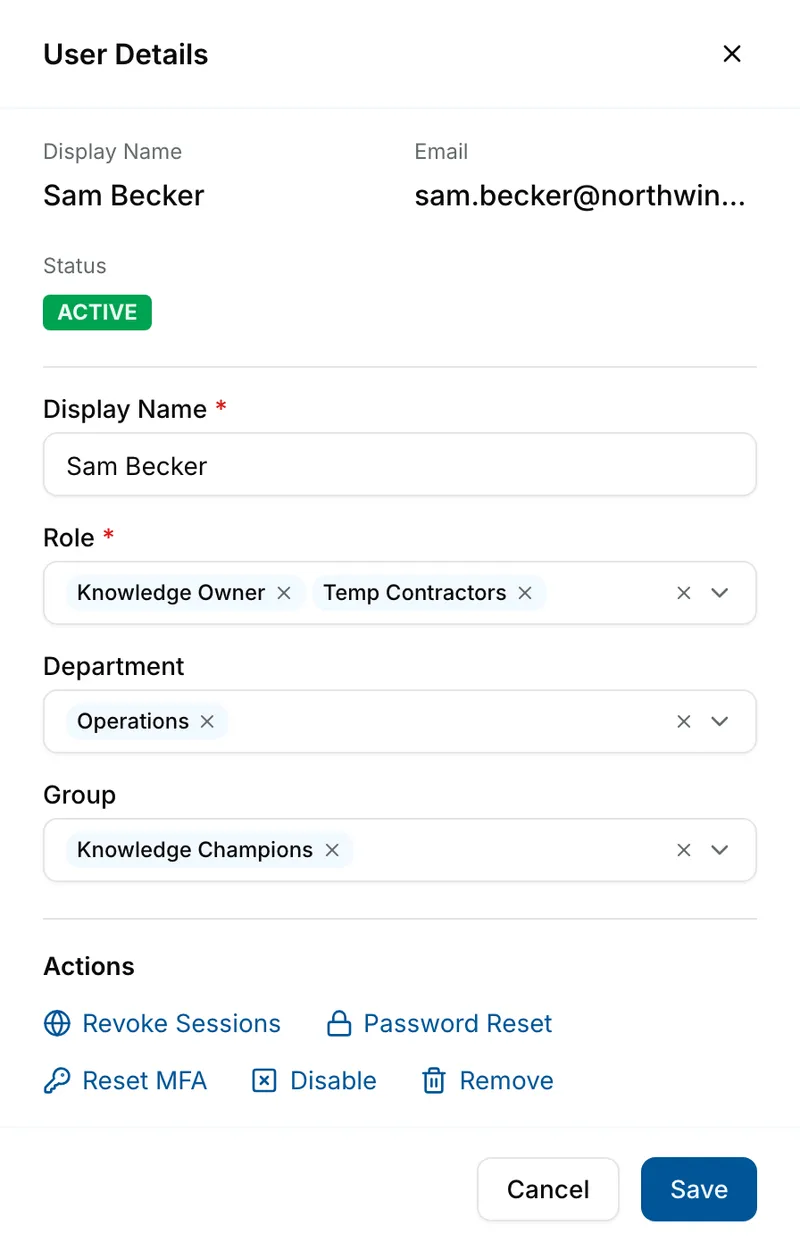
User Details for Sam Becker: Display Name, Email and an ACTIVE status at the top, then Role holding Knowledge Owner and Temp Contractors, Department holding Operations and Group holding Knowledge Champions, the Actions links, and Cancel and Save. Change their details
Edit Display Name, or add and remove entries in Role, Department and Group. Each of the three takes several values. A person must keep at least one role.
Save
Select Save. The panel closes and the row updates.


What success looks like
- User updated successfully! appears and the row shows the new name, roles, department or group.
- A new role applies without a fresh invitation. If the person is signed in, their menus can take up to five minutes to catch up, or less if they reload the page.
User statuses
| Status | What it means | Actions offered |
|---|---|---|
| ACTIVE | The person can sign in. | All five, see Disabling, removing and resetting a user. |
| DISABLED | The person cannot sign in until you activate them again. | Activate and Remove. |
| PENDING | Rare and short-lived: the account is still being set up. People who have not yet accepted an invitation are listed on Invitations. | The same as ACTIVE. |
Filter By offers only ACTIVE and DISABLED. Someone you remove leaves the list for good.
When the Role field is greyed out
Role cannot be changed when your own role lacks Roles & Permissions · Role - Execute, which
the field states. It is also locked for the workspace's last Tenant Administrator: the hint reads
This is the tenant's only active Tenant Administrator, because at least one must remain. Only a
Tenant Administrator can give someone else that role.
If something goes wrong
| Symptom | Likely cause | What to do |
|---|---|---|
| ROLE, DEPARTMENT or GROUP shows a dash for everyone. | Your role cannot list roles, departments or groups, so their names cannot be shown. The Filter By tab says so, for example You do not have permission to list roles. | Ask an administrator to add Roles & Permissions · Role - List, or the List permission for departments or groups, to your role. |
| Someone you expect is missing. | A search term or filter is still applied (both survive a reload), or the person has not accepted their invitation. | Empty the search box and select Reset Filters under Filter By, then check Invitations. |
| Failed to update user. Please try again. | Each change is sent separately and at least one failed. The others may have saved. | Reopen User Details, check what stuck, and save again. |
| The page is replaced by 403 and Access Forbidden. | Your role does not allow that change, for example adding someone to a group without Identity & Users · Group - Update. | Select Go Back and ask an administrator. See Permissions. |
Next
- Disabling, removing and resetting a user - the account actions on each row.
- Inviting a user - adding someone new.
- Choosing a role's permissions - what a role allows.